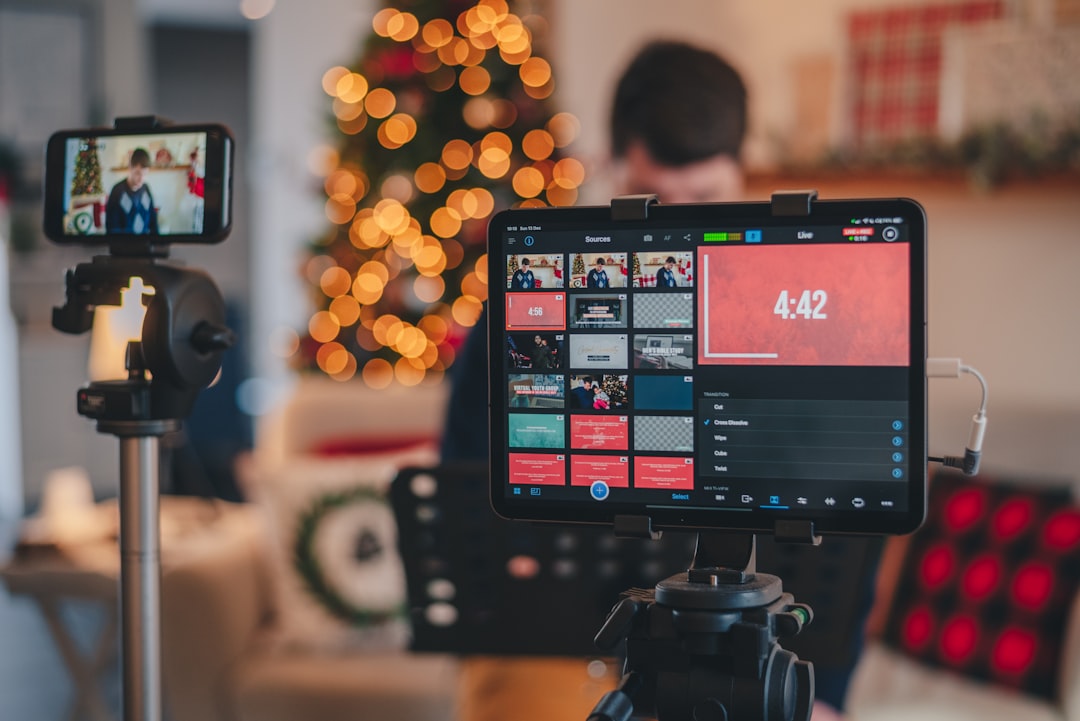
Build an OBS scene collection that is easy to operate under pressure. This guide explains how to plan scenes, layer sources, route audio, assign hotkeys, separate profiles from scene collections, and create a repeatable checklist for starting soon, live, breaks, interviews, gameplay, and ending screens.
Overview
A well-organized OBS setup does more than make a stream look polished. It reduces the number of decisions you need to make while live, limits accidental on-screen exposure, and makes it easier to add a new camera, guest, game, or branded overlay later.
In OBS, a scene is a complete arrangement for a particular moment in your broadcast. A source is an individual element inside that scene, such as a camera, display capture, image, text layer, media file, browser source, or audio input. A scene collection stores scenes and their source arrangements. A profile stores stream and recording settings, such as output behavior and video configuration.
Keep those concepts separate. Use scenes to control what viewers see, profiles to control how OBS processes and outputs the broadcast, and a consistent naming system to make both easier to maintain. Menu names and source behavior can change between OBS versions, so treat the labels below as a planning framework and confirm the exact options in your current installation.
A simple scene-planning template
- Starting Soon: branded still or motion background, music, countdown, and optional chat or social handle.
- Live: primary camera or gameplay view, microphone, alerts, chat, and restrained branding.
- Break: break message, timer or return note, background audio, and no unnecessary camera feed.
- Interview: guest layout, host camera, guest camera or remote browser source, microphones, and backup visual.
- Gameplay: game capture or capture-card input, camera frame, alerts, chat, and optional event or goal elements.
- Ending: closing message, next-stream information, social links, music, and a clean visual endpoint.
Start with the scenes you will use every week. Additional layouts should solve a real production need rather than make the collection harder to navigate.
Checklist by scenario
1. Build the collection before adding decoration
- Create one scene collection for the show format or channel. Give it a clear name, such as Weekly Interview or Main Channel Broadcast.
- Create the core scenes in operating order: Starting Soon, Live, Break, Interview or Gameplay, and Ending.
- Use consistent source names. Prefer names such as Cam - Desk, Mic - USB, Game - Capture Card, and Alert - Browser over vague names such as Video Capture Device 2.
- Put sources into logical groups where useful. A camera group might contain the camera, frame, background, and name label.
- Save a clean version before experimenting with animations, filters, or new browser sources.
2. Starting Soon scene
- Add a background image, video, or color source with enough contrast for text.
- Add the show name and a short instruction, such as “We’ll begin shortly.” Avoid filling the screen with multiple messages.
- Add music only if you have confirmed the source and volume. Route it through the OBS mixer so it can be muted quickly.
- Test any countdown as a browser or media source before using it live. Confirm that it loops, ends, or hides as intended.
- Keep the microphone and camera off this scene unless you intentionally want a pre-show conversation.
3. Live scene
- Place the primary visual first: camera, gameplay, presentation, or demonstration.
- Add the microphone input and verify its mixer meter responds without reaching the clipping range.
- Add alerts as a browser source only after confirming the source URL, dimensions, and visibility.
- Use overlays and branding to support orientation, not to cover important gameplay, captions, or presentation content.
- Keep a clean fallback version of the scene with alerts and decorative elements hidden.
4. Break and ending scenes
A break scene should protect your privacy and prevent unintended conversation. Hide the camera, microphone, desktop capture, and any guest feed unless each is deliberately required. Add a clear return message and a way to mute background audio.
The ending scene should be equally deliberate. Include a concise sign-off, the next action you want viewers to take, and a controlled audio source. If you repurpose recordings into clips, leave enough clean closing material for editors or creator workflow tools to identify the end of the show.
5. Interview scene
- Prepare separate sources for the host and guest instead of relying on one crowded composite whenever possible.
- Label guest sources clearly, especially when testing more than one browser, capture card, or remote contribution.
- Build a backup scene that shows only the host camera and a holding message for the guest.
- Check echo risk by confirming that the guest’s return audio is not being sent back into the guest’s microphone.
- Have a hotkey or quick scene switch ready for removing a guest feed if the connection fails.
6. Gameplay or capture-card scene
- Choose the appropriate capture source for the device and test resolution, frame rate, and audio independently.
- Keep the camera frame, alerts, and chat in separate sources so each can be hidden without rebuilding the scene.
- Check that the game or display capture is not showing private notifications, unrelated windows, or account details.
- Prepare a “technical difficulty” scene with a neutral background and a short message.
For broader preparation, pair this scene workflow with a pre-stream live streaming checklist and review your bitrate and resolution settings separately from your visual layout.
What to double-check
Source order and visibility
OBS renders sources according to their order in the list. A full-screen image can hide every source beneath it, while a camera frame may accidentally cover a face or presentation. Toggle each source off and on, then inspect the result at the same canvas size you plan to use on stream.
Audio routing
Give each important audio source a clear name and decide whether it should be heard in every scene. Check microphone, desktop or game audio, music, alerts, and guest audio independently. Use monitoring carefully: hearing an input through both the source and a return path can create an echo. Record a short local test and listen back with headphones before going live.
Webcam, capture card, and browser sources
Confirm that each camera or capture device appears correctly after restarting OBS. Browser sources may depend on a URL, transparent background, animation, or connection, so test them in the actual scene rather than assuming they will behave like a static image. If a source is unreliable, keep a replacement image or fallback layout ready.
Hotkeys and transitions
Assign hotkeys only to actions you can remember. Useful choices include switching to Starting Soon, Break, Live, or Technical Difficulty; muting the microphone; and hiding a camera or alert layer. Avoid shortcuts that conflict with the software you use during a presentation or game. Test hotkeys while OBS is not the active window if that is how you expect to use them.
Profiles and backups
Do not assume that exporting a scene collection backs up every setting in your profile. Export or record both separately when your OBS installation provides those options. Keep a copy of scene collections, profiles, custom graphics, music references, and important browser-source details in a known folder. After a major change, make a dated backup rather than overwriting the only working version.
Common mistakes
- Building one giant scene: A single scene with every possible source is difficult to troubleshoot. Create focused scenes and use groups for related layers.
- Using unclear names: Generic device names slow down changes and make duplicate sources easy to confuse. Rename sources as soon as you create them.
- Changing several variables at once: If you replace the camera, add an alert, and alter audio filters together, you will not know which change caused a problem. Test one category at a time.
- Trusting the preview alone: A scene can look correct while its audio is silent, delayed, duplicated, or too loud. Record and review a short test.
- Relying on a live-only source: A guest connection, browser alert, or capture device can fail. Keep a visual fallback and a scene switch ready.
- Skipping privacy checks: Display capture can reveal messages, files, tabs, or account details. Use a dedicated presentation or game window where practical.
- Adding branding without hierarchy: Too many frames, labels, animations, and notifications compete with the content. Establish one primary focal point for each scene.
When to revisit
Revisit your OBS scene collection before a new series, seasonal programming cycle, major guest appearance, platform change, or format expansion. It is also worth reviewing after you replace a camera, microphone, capture card, monitor, or internet connection. Hardware changes can affect source names, audio routing, canvas layout, and performance even when the scenes themselves appear unchanged.
Use this short maintenance routine:
- Open every scene and hide or show each major source once.
- Check microphone, game, music, alert, and guest audio separately.
- Test your most important hotkeys and transition behavior.
- Record a brief sample from Starting Soon through Live and Break.
- Review the recording for framing, audio balance, private information, and unreadable text.
- Export or copy the updated scene collection and profile.
- Write down the date and the changes so the next troubleshooting session starts with context.
Keep the collection simple enough to operate without searching through menus. When you add a new format, create the smallest scene that supports it, test it in isolation, and only then add it to your main workflow. That habit keeps OBS flexible while preserving a dependable broadcast path.